It has been five months since I last blogged. We were so busy working on our house that I didn't take the time to keep up with my blog. Things have settled down a bit now - my new sewing room is completed and our family reunion held at our house is behind us. So, now that life is pretty much back to normal (whatever normal might be....)I won't stray away for so long.
My first goal is to get a camera that is user friendly for downloading pictures here. That is one of the big reasons I didn't take the time to blog. I have an outdated camera and was trying to take pictures from my cell phone to use on the blog. Time consuming and hard to get on the blog with such a little phone. I am researching cameras now with wifi to see what is good. Any input is greatly appreciated. Since retiring I have lost touch with new technology.
Pictures and updates of my new sewing room are to come! My quilting buddies have been over numerous times for sew days. We have enjoyed the space to be able to sew together.
Happy Sewing
Monday, August 25, 2014
Sunday, March 23, 2014
Vintage Singer's - Surprise From My Son
My son surprised me with two vintage Singer sewing machines he had in storage - how did I not know about that?
Here is the oldest one - an 1895 King Tut edition. I think also called the Spinx. It is badly rusted on the body and the head is frozen up. But, looks like all the parts are in tact. Has the long shuttle bobbin.
And here is the 1914 Singer Red Eye. Her body is in better shape, but she is missing the bobbin cover plate. She is also rusted and the head is frozen up. I have done some research on-line about restoring old vintage sewing machines. So, I decided to start on Red Eye since parts are readily available for this model. It was a very common sewing machine back in the day. Here she is before I started:
The first thing I did was remove the bobbin winder from the machine. Scary. The picture on the left with light aqua background is the bobbin winder before I cleaned it up. Nothing moves on it. Frozen solid with rust.
I used WD40 to loosen all the screws and free up all the frozen pieces. Then I was able to take it apart to clean all the separate pieces.
The picture on the right with the pink background is after I cleaned it up and got it back together. I was so excited. The wheels now spin and all the pieces with springs now move freely. I just need to order a new rubber piece for the bobbin winder wheel and she'll be ready to wind bobbins. Already have the rubber piece and bobbins on order!
I cleaned it up with WD40 to loosen the rust and some steel wool and a lot of elbow grease. I had to make sure not to get WD40 on the painted area with decals as it will harm them. I took it all apart to clean each piece. I used sewing machine oil to clean the black painted piece then I rubbed it with some Turtle Car Wax to shine her up the best I could. I used a polishing compound on the metal pieces. They are stained from being rusty for so long, but all in all I am pretty happy how she looks now. Pretty good for being 100 years old and no telling how long she lived outside in the weather. And, she can move once again!


Here is the oldest one - an 1895 King Tut edition. I think also called the Spinx. It is badly rusted on the body and the head is frozen up. But, looks like all the parts are in tact. Has the long shuttle bobbin.
 |
| 1895 King Tut Spinx Edition |
And here is the 1914 Singer Red Eye. Her body is in better shape, but she is missing the bobbin cover plate. She is also rusted and the head is frozen up. I have done some research on-line about restoring old vintage sewing machines. So, I decided to start on Red Eye since parts are readily available for this model. It was a very common sewing machine back in the day. Here she is before I started:
 |
| 1914 Red Eye |
The first thing I did was remove the bobbin winder from the machine. Scary. The picture on the left with light aqua background is the bobbin winder before I cleaned it up. Nothing moves on it. Frozen solid with rust.
I used WD40 to loosen all the screws and free up all the frozen pieces. Then I was able to take it apart to clean all the separate pieces.
The picture on the right with the pink background is after I cleaned it up and got it back together. I was so excited. The wheels now spin and all the pieces with springs now move freely. I just need to order a new rubber piece for the bobbin winder wheel and she'll be ready to wind bobbins. Already have the rubber piece and bobbins on order!
I cleaned it up with WD40 to loosen the rust and some steel wool and a lot of elbow grease. I had to make sure not to get WD40 on the painted area with decals as it will harm them. I took it all apart to clean each piece. I used sewing machine oil to clean the black painted piece then I rubbed it with some Turtle Car Wax to shine her up the best I could. I used a polishing compound on the metal pieces. They are stained from being rusty for so long, but all in all I am pretty happy how she looks now. Pretty good for being 100 years old and no telling how long she lived outside in the weather. And, she can move once again!
Sun Bonnet Sue gets her Rag Rug
Finally finished the rag rug. I ended up taking it apart so I cound join the rows together properly. I like it much better this way. But, I learned a few things from making this rag rug - it is my first. I was increasing at the same place on each row and that made it start to turn square. At the point I figured this out I didn't want to rip out again. So, I just started increasing randomly. That was much better. So, had I done this from the start my rug would be more oval than it is. Live and Learn! Here it is with Sun Bonnet Sue.

Wednesday, March 19, 2014
My Treadle Cabinet
We are still working away on expanding my new sewing room and other renovations in our house. I never dreamed it would take this long, but hubby decided to change out our old single pane windows for new dual pane/tinted windows.
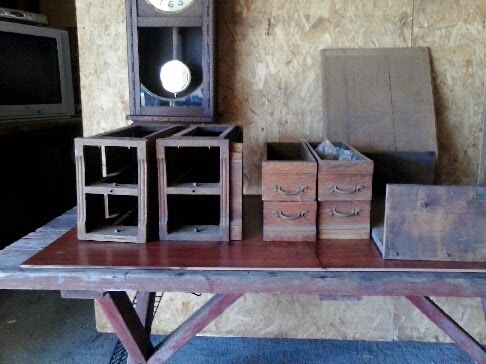
So, in the meantime, I have been dreaming and planning for my new sewing room. I dug out my old treadle sewing cabinet. I have had it since I was about 13 years old when I first started sewing. It was in my bedroom closet and I used it to set my sewing machine on to sew. There was never a treadle in it and I have no clue where it came from. My parents have both passed away, so I have no one to ask how I got it. My parents were not into antiques, so I am guessing it came from a family member or someone they knew. I used it to hold my sewing machine up until about 20 years ago, when I decided she needed to be refinished. I started the job, but never completed it. She has been in storage since then. My son is going to refinish for me - Yeah!! He loves to refinish old things. I am excited to have her back in my life and will give her a special place in my new sewing room. Here she is in the back of my car heading to my son's house.

I am doing some research to find out what kind of cabinet she is. She is not a Singer. She has no markings so I have nothing to use for clues. I have been looking on Pinterest and other sites. So far, I think she is a National based on what I have seen on the internet.
There were little treasures left in her drawers from years ago. Little jewelry with my daughters' names inscribed. Old wooden spools of thread and odds and ends of rick rack and notions that I used back in the day. Another trip down memory lane! I can't wait to get her back.
Here are some pics my son sent me after he got her all apart.


So, in the meantime, I have been dreaming and planning for my new sewing room. I dug out my old treadle sewing cabinet. I have had it since I was about 13 years old when I first started sewing. It was in my bedroom closet and I used it to set my sewing machine on to sew. There was never a treadle in it and I have no clue where it came from. My parents have both passed away, so I have no one to ask how I got it. My parents were not into antiques, so I am guessing it came from a family member or someone they knew. I used it to hold my sewing machine up until about 20 years ago, when I decided she needed to be refinished. I started the job, but never completed it. She has been in storage since then. My son is going to refinish for me - Yeah!! He loves to refinish old things. I am excited to have her back in my life and will give her a special place in my new sewing room. Here she is in the back of my car heading to my son's house.
I am doing some research to find out what kind of cabinet she is. She is not a Singer. She has no markings so I have nothing to use for clues. I have been looking on Pinterest and other sites. So far, I think she is a National based on what I have seen on the internet.
There were little treasures left in her drawers from years ago. Little jewelry with my daughters' names inscribed. Old wooden spools of thread and odds and ends of rick rack and notions that I used back in the day. Another trip down memory lane! I can't wait to get her back.
Here are some pics my son sent me after he got her all apart.
i
And here are a couple of pictures after he started working on the top. I had already stripped the veneer off years ago, so it is down to bare wood that the maker used which was not intended to show. It has worm holes in it. I think that gives it character.

Monday, March 10, 2014
Rag Rug Progress -Fabric Balls Wound - Rag Rug Growing
I finally finished prepping all the fabric for the rag rug. That was sure a long process. Actually the ironing took the longest since the fabric wants to twist so much. That is a step that can be omitted. I decided to iron the fabric in half with wrong sides together so you see the fabric on both sides. I wanted as much color to show as possible. But, if you don't care if the back side of the fabric shows then ironing is not necessary. Here are my fabric yarn balls. Now to get started crocheting the rug.

Crocheting the rag rug sure goes a lot faster than prepping the fabric. I will have this done in less time than it took to prep all the fabric. I spent about 14 hours ripping the fabric, sewing ends together and ironing the fabric. I began crocheting this afternoon - I figure I am about a third of the way into the rag rug and only spent about two hours crocheting. Here is what I have done so far. Molly came in to check it out - a new rug to lay on.....

I am not liking the way it looks where I changed colors. I should have joined with a slip stitch before adding the next color. I didn't even notice this until I saw this picture. Darn, do I rip everything out now and start over, or start joining at the end of each color now, or continue crocheting the rug as I have been???? Will I be happy if I don't rip this out????
Crocheting the rag rug sure goes a lot faster than prepping the fabric. I will have this done in less time than it took to prep all the fabric. I spent about 14 hours ripping the fabric, sewing ends together and ironing the fabric. I began crocheting this afternoon - I figure I am about a third of the way into the rag rug and only spent about two hours crocheting. Here is what I have done so far. Molly came in to check it out - a new rug to lay on.....
I am not liking the way it looks where I changed colors. I should have joined with a slip stitch before adding the next color. I didn't even notice this until I saw this picture. Darn, do I rip everything out now and start over, or start joining at the end of each color now, or continue crocheting the rug as I have been???? Will I be happy if I don't rip this out????
Thursday, March 6, 2014
Shoulder Pocket Bag Party
I got together with some of my Quilty sisters yesterday and we all made a shoulder bag with two zippers and lots of pockets. We had sew much fun and all of our bags are so darn cute. Here they are.


This is mine. I choose to use batiks in the blue family since I wear jeans so often and I just LOVE batiks. This is the front. It has a zipper on the top opening and see the other zipper on the front pocket. The light accent is also a big pocket. It also has D rings and swivel snaps to attache the shoulder straps.
And this is the back of mine. It has two pockets. and there are also two pockets inside the bag. Now all I need to finish it off is a couple of zipper pulls.
Sunday, March 2, 2014
Quilt Run Finds
Sorry the pictures loaded sideways. Cute kittens and teddy bears.

And a Care Bear focus fabric for a little baby girl.

Saturday, March 1, 2014
Rag Rug Progress - Miles and Miles of Fabric Strips
I decided to cut my fabric into 1.5" widths for my rag rug. That way I can fold them in half and iron to ensure that the color/printed side of the fabric would show as I make the rug. I didn't want the whitish wrong side of the fabric showing and making the rug look washed out. I am adding white strips anyway to go with the white iron bed and the white in the Sunbonnet Sue quilt.
Here is my progress so far.

The prep does take a long time. I spend about one hour per 1 1/2 yards of fabric just to prep it to get it ready to make the rug. I started out cutting the fabric, but then went to ripping it. Much quicker and I like the effect on the edge of the fabric. I also decided to sew the strips together with a 1/4" seam. I didn't like the bulk of joining the strips with that slit and knot process. The knot ends up visible. Plus, it was much quicker for me to sew the seams together than slitting and knotting.
So, my process is snip the fabric every 1.5" on the lengthwise grain. Rip, sew ends, iron in half and roll into fabric balls. When ironing I would iron a section, then roll, then iron another section, then roll. If you just iron it all and then try to roll it you end up with a twisted mess. So roll sections as you iron.
Well, off to the Southern California Quilt Run with my quilting buddies. Hubby thinks I am nuts. It is storming here and I am taking off. Have a great day!
Here is my progress so far.
The prep does take a long time. I spend about one hour per 1 1/2 yards of fabric just to prep it to get it ready to make the rug. I started out cutting the fabric, but then went to ripping it. Much quicker and I like the effect on the edge of the fabric. I also decided to sew the strips together with a 1/4" seam. I didn't like the bulk of joining the strips with that slit and knot process. The knot ends up visible. Plus, it was much quicker for me to sew the seams together than slitting and knotting.
So, my process is snip the fabric every 1.5" on the lengthwise grain. Rip, sew ends, iron in half and roll into fabric balls. When ironing I would iron a section, then roll, then iron another section, then roll. If you just iron it all and then try to roll it you end up with a twisted mess. So roll sections as you iron.
Well, off to the Southern California Quilt Run with my quilting buddies. Hubby thinks I am nuts. It is storming here and I am taking off. Have a great day!
Thursday, February 27, 2014
Rag Rug for Sunbonnet Sue
I've decided to make a rag rug to join Sunbonnet Sue in our Antique heirlooms guest bedroom. The picture I showed in my previous post had a braided rug I found on-line at Walmart, but it was too pastel for my liking. So the hunt was on for some 30's colors of fabics. Of course I have zero 30's fabric in my stash. I didn't want to spend a fortune for fabric for a rug so off to thrift stores to hunt for old sheets. Well, that didn't produce much luck, so I decided since I had to return the other rug to Walmart I would check out their discount bolts. Here is what I ended up with. Most was $2 a yard. I figured I would need about 18 yards of fabric. After Walmart I headed on over to Joann's for some bleached muslin for the white sections of the rug. I got the 110" length to make my strips nice and long and used my 50% coupon.
I want my oval rug to be about 36" x 60" so I substract the width from the length to get my starting chain length. My chain needs to be 24" long. I am starting with white, then a color row and continue to that pattern for the entire rug. White, color, white, color...... I will post some pics as I go along.
TUTORIAL
Here is a link to a tutorial to make a rag rug. Rag Rug Tutorial

I decided to prewash all the fabric to remove the sizing and soften it up a bit. I really wanted to make the rug out of flannel, but couldn't find any at a cheap price, so I opted for cotton and prewashed and even used fabric softener. I have arthritis so I knew this project would play havoc with my wrists, so anything to soften the process will be helpful.
Now off to start ripping fabric. The fabric prep for a rag rug is more time consuming than crocheting it.
I want my oval rug to be about 36" x 60" so I substract the width from the length to get my starting chain length. My chain needs to be 24" long. I am starting with white, then a color row and continue to that pattern for the entire rug. White, color, white, color...... I will post some pics as I go along.
TUTORIAL
Here is a link to a tutorial to make a rag rug. Rag Rug Tutorial
Now off to start ripping fabric. The fabric prep for a rag rug is more time consuming than crocheting it.
Tuesday, February 25, 2014
Sunbonnet Sue Gets a New Room
The demolition and reconstruction is coming along a bit slowly, but I certainly won't complain! It will sure be worth the wait when it is completed. I will have one big L shaped sewing room...I am getting sew excited!
We emptied out our little office downstairs and moved our antique iron bed and antique dresser/mirror into the "new guest bedroom." This called for Sunbonnet Sue to come out of hiding and take her rightful place on the antique bed.
My husband's great grandmother and grandmother made this quilt, probably in the 1940's I would guess. The top laid unquilted for many years. After they both passed away a family member took all of grandma's quilt tops and had them machine quilted on a longarm. That was back in 1998 and before I ever started quilting. By some miracle I ended up with the gorgeous Sunbonnet Sue quilt. Well, I decided she needed to come out and be enjoyed. I just love her. My mother-in-law says she recognizes a lot of the fabrics from clothing when she was a little girl. My mother-in-law is 83 now.
The antique dresser and mirror belonged to my hubby's other grandmother on his father's side of the family. Sunbonnet Sue came from his mother's side of the family. We inherited the dresser and mirror after my 's beloved grandmother passed away about 20 years ago.
The little porcelain boy and girl were his grandmother's as well. They are adorable. I always commented to her how precious they were. I was delighted to have them come and live with us right on grandma's dresser, too! Isn't her dresser and mirror just gorgeous. Now that they are downstairs they will be seen and appreciated by everyone.
Grandmother's Flower Garden Teddy Bear
Did you notice the teddy bear leaning on the green pillow? My sister-in-law made that out of one of grandma's very loved and worn out quilts. She said the quilt was beyond repair. I didn't see the quilt prior to it becoming teddy bears, but I am happy to have one of the teddy bears made from the very loved quilt. It appears to have been a Grandmother's Flower Garden quilt. Oh how I would have loved to have seen it in quilt form!
Look at the little heart tag attached to the teddy. Precious gift. My sister-in-law is not a quilter, but she likes to sew. I am still working on converting her over!!!
When my grandkids stay the night with us they sleep in the old iron bed, so they are learning to appreciate antiques and also learning about their ancestors. I have seven grandkids ages from 24 to 13 - I am hoping the quilting bug will hit some of them. Since I retired in 2010 I have had the time to teach my youngest granddaughter to sew. She loves it so far and I keep my fingers crossed that she won't tire of it.
Saturday, February 22, 2014
Chevron Quilt Top Finish
I finally finished the Chevron quilt top. I used some Riley Blake fabric I bought back in 2008. My New Year's goal is to try and use up fabric I have. That is sure a challenge when there is so much beautiful fabric out there calling my name!!! The gray is a medium Kona Gray I already had as well. I really need to get a new camera. The quilt is much more vibrant than in this picture.

We are still working away on the quilting room remodel, so I haven't had much time to sew or blog. All the walls are down and new drywall and texture up to repair the holes left from taking out the walls. The carpet is out and now shopping for new flooring. We are also redoing the bathroom upstairs at the same time. We put in a new Jacuzzi tub - can't wait till I can soak in it!
Saturday, February 8, 2014
Paper Hearts Fabric Audition
I found some fabric that might work with the Paper Hearts pattern. Take a look and see what you think. I will be making it a full size bed quilt instead of the lab size in the pattern.

I am thinking of using the dark gray and light gray for the background fabrics and the hearts out of all the different pinks. I only need nine pink fabrics and I have ten here, so one has to go. Which one???? I am still not sure if I like them all together or not. That is hardest part of quilting for me. Selecting the right fabrics.
So, which pink fabric would you would take out?
Monday, January 27, 2014
Paper Hearts
In the midst of all this deconstruction and most of my sewing stuff inaccessible I have spent time online - DANGEROUS. I found an adorable quilt with hearts by Tula Pink called Paper Hearts. It is perfect for one of my granddaughters who loves hearts and loves pink. Now time to choose fabric!
Like I really need to start a new project, but you know how that goes...
Here is a picture of the quilt. Modern look is perfect for a teenager. Hunt is on for the perfect fabric! Isn't that the most fun of quilting???

Like I really need to start a new project, but you know how that goes...
Here is a picture of the quilt. Modern look is perfect for a teenager. Hunt is on for the perfect fabric! Isn't that the most fun of quilting???

Thursday, January 23, 2014
The Walls Come Tumbling Down
Oh my, what a mess. One side of each wall is now demolished. There is rubble everywhere - broken drywall, insulation and lots of dust! We had insulation between all the inside walls to help keep noise levels down when all the kiddies were home. I somehow didn't visualize THIS much of a mess.
Remember the closet and cutting table wall and door I showed you yesterday. Well look at them now - they are nearly gone. Just down to the studs. Those will get ripped out tomorrow. I am standing in one bedroom taking the picture seeing completely into the bedroom with the closet being removed. The other bedroom is behind the closet wall on the right. All the walls are not down yet.

And this is the view from the hallway showing the door openings to all three of the kids bedrooms. The door on the right was our son's bedroom (then our guest room). The door straight ahead to the left was one daughter's room (now where my sewing machines, fabric stash and ironing board reside). And, the door straight ahead to the right was our other daughters's bedroom where my longarm and cutting table now reside.

Remember the closet and cutting table wall and door I showed you yesterday. Well look at them now - they are nearly gone. Just down to the studs. Those will get ripped out tomorrow. I am standing in one bedroom taking the picture seeing completely into the bedroom with the closet being removed. The other bedroom is behind the closet wall on the right. All the walls are not down yet.
And this is the view from the hallway showing the door openings to all three of the kids bedrooms. The door on the right was our son's bedroom (then our guest room). The door straight ahead to the left was one daughter's room (now where my sewing machines, fabric stash and ironing board reside). And, the door straight ahead to the right was our other daughters's bedroom where my longarm and cutting table now reside.
They haven't finished removing all the drywall yet. As you can see above, only one side of the drywall is off so far. They have to reconfigure where light switches will be moved to.
My hubby brought the big tractor to the front of the house and the workers used an upstairs window to dump all the rubble into the tractor bucket. This saved them many trips up and down the stairs. They are very pleased he has a big tractor!
Memories, memories, memories.Ah bittersweet.
A special day for my hubby, too.
Today is my hubby's 62nd birthday.We can't believe he is social security age already. Another milestone. Where did all the time go????
What a sweetheart to spend his birthday doing this for me. I am so lucky! We did go out for pizza with the kids and only one granddaughter. Their work and college schedules make family get-togethers tough now.
Wednesday, January 22, 2014
Demolition Day
I got the closets emptied. OMG that was an ordeal.That closet held all my yarn and rolls of home dec fabric, serger and long arm thread and other sewing supplies.I have way too much yarn stash. I don't crochet as much as I used to because it hurts my wrists so much now. Most of the yarn I bought when there were huge sales going on. I will donate the really soft yarn to ladies who make caps for breast cancer patients. That is what I bought the yarn for but didn't use it all before my wrists went bad.
Here is a picture of one of the walls that will be torn down. That wall divides two bedrooms. See the mirrored closet doors? I will lose that closet and the cutting table next to it with my peg board where I hung all my rulers. And the door on the right of the cutting table is going away, also. I will lose a smaller closet in the guest bedroom as well, but I didn't store any sewing supplies in there. Our 19 year old granddaughter was living with us and stayed in that room, so I had already emptied that closet out for her. After she left I never filled the closet back up - thank goodness!!!

Notice the end of my longarm frame in the lower left corner? That shows you how limited my space is right now. The longarm goes all the way to the back wall and to the other side wall. The long arm is in one bedroom and my sewing machine, fabric closet and ironing board are in another bedroom. So right now I am taking up two bedrooms. The third bedroom has our antique iron bed and antique dresser/mirror and chest in it. The bed and chest will be going downstairs into the little office and the antique dresser/mirror will stay in the sewing room for storage. It won't fit in the little office. It belonged to my hubby's grandmother so it is a keeper. I love antiques anyway.
When all the walls come down I will have the space of the three bedrooms and a wide hallway. It will be like a big loft!
We will need to put new flooring down since there will be gaps without carpet when removing the walls. The carpet is 30 years old, so it is time to go anyway. But, actually it isn't really bad - I guess since it is upstairs and doesn't get the traffic like in the main part of the house. I would prefer laminate wood floors, but my hubby is worried about the sound from my long arm being too loud downstairs. He says even with the carpet in there now, when I am using the long arm it sounds like an airplane taking off above. So, I guess new carpet will be going in. Unless any of you can give some good suggestions for flooring that helps with sound insulation???
Tuesday, January 21, 2014
Dream Quilting Room and a Trip Down Memory Lane
What does your dream sewing room look like?


I am SEW excited and also kinda sad. Tomorrow the contractor will begin the process of knocking down bedroom walls in our upstairs to expand my quilting room. Yes, a dream sewing room! I am SEW excited to get a much larger area just for me, but sad to think how our three kids and even some grandkids used to call these three bedrooms home. Now it will be one big room to accommodate my long arm and all my sewing machines, nice big cutting table, and plenty of storage for my stash and all those other gadgets we love to have. How time changes our lives.

or this:

Well, it is time for me to put a dream into reality. But, will designs I love work in my own space and within my budget.....
I am SEW excited and also kinda sad. Tomorrow the contractor will begin the process of knocking down bedroom walls in our upstairs to expand my quilting room. Yes, a dream sewing room! I am SEW excited to get a much larger area just for me, but sad to think how our three kids and even some grandkids used to call these three bedrooms home. Now it will be one big room to accommodate my long arm and all my sewing machines, nice big cutting table, and plenty of storage for my stash and all those other gadgets we love to have. How time changes our lives.
I cherish those days when kids were snuggled in beds in these rooms and we have so many wonderful memories from those years. All three of our "kids" have homes of their own now and our youngest grandchild is 13 years old. The fun days of seven grandkids spending the night with us is just a memory now. Five grandkids are now in college and working - so spending the night with grams and gramps are just memories to cherish.
One day, right before Christmas, I was upstairs in my little quilting room complaining how about how small my little cutting table is. Hubby asked why I made such a small one. I laughed and said just where would you put a larger one in here? He must have really pondered over this cause the next day he suggested we tear down all the walls and make one big room! "Are you kidding? Oh my gosh, that would be a dream come true!!!!" Well, he wasn't kidding - he scheduled it to happen - REALLY!
Now, you would think I would be over joyed, but it actually made me sad to think we really are empty nesters. How did that happen so fast? Where did all the years go? Can you relate??? Well, my excitement to have so much space and planning everything quickly perked me up! Out comes the graph paper and tape measure to plan the layout. It brought me back to over 30 years ago when we had the graph paper out were drafting the house layout and trying to squeeze four bedrooms in upstairs so each of our kids could have their own room. And now here we are deconstructing those very rooms we worked so hard to make fit. Wow, I spent a lot of time going down memory lane.
Then I realized I now have closets to empty and furniture to figure out what to do with. I will lose two closets in this process and I don't know about you, but as soon as the kids move out things just appear in those empty closets over night.
We have a little office downstairs that we will move our antique iron bed into and an antique chest. I will keep one antique dresser/mirror in the sewing room and use it for storage. We will have to build some storage for all my sewing stuff and yarn that I have been storing in those two closets. For now, everything is going in tubs. Hubby says I will be out of commission for sewing for a couple of months. I just laughed! HaHa, he doesn't know us quilters that well. Out comes my folding table and up goes my sewing machine in the living room! A few months without sewing - NOT HAPPENING!
Sunday, January 12, 2014
HST Chevron Quilt Progress
I sewed some chevron rows together using each of the prints to see how they would look. Now I need to decide on the placement of the prints. I have five different print fabrics and nine rows of print chevrons.So, one of the print fabrics will only be used once. Humm, which one should that be? What do you think?

I have to say, this is going together much easier than the jelly roll Chevron Zig Zag quilt. The jelly roll zig zag quilt required you to sew it together on the diagonal So, I had to lay the entire quilt out before I could sew it together in order to figure out the correct blocks to sew together. The HST method is a no brainer. You can sew one row at a time and also gives you the flexibility of EASILY rearranging your rows to determine the best placement. This will be my go to Chevron pattern.
I have to say, this is going together much easier than the jelly roll Chevron Zig Zag quilt. The jelly roll zig zag quilt required you to sew it together on the diagonal So, I had to lay the entire quilt out before I could sew it together in order to figure out the correct blocks to sew together. The HST method is a no brainer. You can sew one row at a time and also gives you the flexibility of EASILY rearranging your rows to determine the best placement. This will be my go to Chevron pattern.
HST Chevron: New project from stash fabric
Before Christmas I made a Chevron Zig Zag quilt using 2 1/2" strips, I decided I wanted to try one using the half square triangle method. Also, I am seriously trying to use fabric from my stash this year. I am so tired of looking at the same fabric wondering if I will ever use it. So far, in 2014, I made a Valentine wall hanging and the Square in a Square twin sized quilt with stash fabric. But, those barely made a dent in my stash! I am still determined to reduce my stash this year! Hard with all those new gorgeous fabrics out there.....
Here is the fabric I choose for the HST Chevron quilt. I had originally purchased the fabric it in 2009 with a particular pattern in mind, so I had odd amounts of each fabric. Now, five years later that pattern is too juvenile for any of my grandkids. I decided to make this Chevron quilt for my 13 year old granddaughter whose favorite color is orange. She is my youngest grandchild. I also found this medium gray Moda in my stash. I will use it between each row of print.

Here is the fabric I choose for the HST Chevron quilt. I had originally purchased the fabric it in 2009 with a particular pattern in mind, so I had odd amounts of each fabric. Now, five years later that pattern is too juvenile for any of my grandkids. I decided to make this Chevron quilt for my 13 year old granddaughter whose favorite color is orange. She is my youngest grandchild. I also found this medium gray Moda in my stash. I will use it between each row of print.
I need this to be twin bed size so I drafted the pattern on graph paper to determine what size squares to cut and how many. I am starting with 6" squares which will finish at 5". The quilt will be 14 rows across and 18 rows down and finish at 70" x 90. I even have enough fabric to make a pillow case. I forgot to take a picture of the binding fabric. It is a stripe with all the colors from these fabrics. I will cut the striped binding fabric on the bias so it has that nice spiral effect.
Friday, January 10, 2014
Square in a Square Quilt and tutorial link
I finished sewing together all the rows on the square in a square quilt. i still need to sew on the outside borders. I may use 4" borders on the sides to widen the quilt a bit and just use 2" borders on top and bottom. without borders it measures 57 1/2" x 80". Wider side borders will make it fit a twin bed. I am not real crazy about this quilt right now. I am hoping quilting it will bring it to life. Also, I am considering unsewing one of those dark blue blocks that are so close together. See them? That was sure an oops placing them so close. Or should I leave it and that will be my "humble" block? But, the placement bothers me. Why didn't I see it when they were laid out at the quilt retreat? Too many distractions with all my quilting sisters around? No one else picked up on it either. Darn. Here is the link to the Square in a Square tutorial from Missouri Star Quilt Company: Tutorial
So, would you move one of those dark blue quilt blocks to another spot?

So, would you move one of those dark blue quilt blocks to another spot?
Thursday, January 9, 2014
UFO Progress using Morning Tides by Free Spirit
I completed one UFO while at the quilt retreat last weekend. The Valentine wall hanging. However, I still need to quilt it.
After completing that project I decided to work on a bright fun quilt using a charm pack and a jelly roll and 1 1/2" strips. I saw a tutorial on Missouri Star Quilt Company. The tutorial is called "Square in a Square". It is a very easy pattern and I was able to complete all the blocks and sewed the rows together before it was time to leave on Sunday.
The fabric is Morning Tides by Free Spirit and I used Moda White for the sashing. Not my usual palette, but thought a teenage girl would love it. I have six teenage granddaughters and two teenage great nieces. So I have plenty of options for a home for the wild quilt. Here are the swatches of the fabric.


So, that still leaves the other two projects on my UFO list. Darn. Hoped that list would shrink more.
After completing that project I decided to work on a bright fun quilt using a charm pack and a jelly roll and 1 1/2" strips. I saw a tutorial on Missouri Star Quilt Company. The tutorial is called "Square in a Square". It is a very easy pattern and I was able to complete all the blocks and sewed the rows together before it was time to leave on Sunday.
The fabric is Morning Tides by Free Spirit and I used Moda White for the sashing. Not my usual palette, but thought a teenage girl would love it. I have six teenage granddaughters and two teenage great nieces. So I have plenty of options for a home for the wild quilt. Here are the swatches of the fabric.
So, that still leaves the other two projects on my UFO list. Darn. Hoped that list would shrink more.
Wednesday, January 1, 2014
Happy New Year 2014 - Friendship Group Quilt Retreat
Do you ponder over the past year as the new year rolls in? Well, I sure do. What did I learn from my life experiences this year? How can I improve? What goals do I have for the new year? I spend a lot of time reflecting back on the many different areas in my life.
In my "quilting life" I am blessed to be involved with a wonderful friendship group called TGIF. We meet twice a month on Friday evenings to work on projects, eat, and visit. These great ladies have become very special friends to me. I can't imagine my life without them. Often, some of us get together to have sew days as well, or even shopping trips for quilty things or we go on quilt hops together and quilt retreats. A few times a year we have get togethers so our hubbies can join in. How many of you have a friendship group? Kindled hearts - what a blessing.
On January 3 I will be joining my friendship group on a quilt retreat for three days.It is being held at a local nunnery in wine country in Temecula, CA. It is a beautiful setting and so peaceful. Wonderful rose gardens and other flowers and beautiful views of the mountains. They feed us well and provide humble accommodations for us. No TV in the rooms and simple furnishings, but all we need - we are there to sew and enjoy our time together, not spend time in our rooms. We have a nice big gathering room open to us 24 hours. It is so fun to sew in our jammies and slippers if we want! I am so excited! So far I have pulled out a few UFO's to take to work on: a red/white/blue star patriotic table topper, a Valentine wall hanging or table topper and a pumpkin/fall table topper. I am gathering fabric for some cute little coin purse's to make. I think I have plenty to keep me busy! It will feel so good to get some of those UFO's done at the beginning of the New Year!
Here are a few pics of what I will be working on. I am trying to figure out why the pictures are sideways or upside down. They weren't that way when I took the pictures.
 |
| I chose Civil War fabric - Patriotic red/white/blue table topper. |
 |
| Using red scraps for this Valentine wall hanging or table topper. |
 |
| Homespun fabric for the pumpkins. |
Subscribe to:
Comments (Atom)